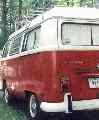
One annoyance '69-79 bus owners choose to tolerate in the face of other, more pressing repairs is a problem with the front door locks. The symptom: when the door is locked, the key will not turn the lock cylinder easily due to a stretched or broken spring that no longer retracts a lever on the lock mechanism. If the spring is stretched, rapping the door around the handle will jog the weak spring and you can turn the key freely. If the spring is broken, you learn to turn the key with varying increments of pressure, jiggling until a lever on the lock finally allows you admission to your bus. Pressing the outer door handle button before using the key exacerbates the situation and can double your required jiggling time. On wet days, you may notice that moisture is your friend and the subdued lock grants passage easier. As you gain proficiency in your alternate lock coaxing techniques, you delay the inevitable, proper repair longer...and longer. If you wait too long, and you're in the "jiggler" catagory, you might eventually break the pot metal lock cylinder by forcing the key, your bitter reward for procrastination. My wife disdained learning key jiggling skills so when she drove the bus she'd surrender to the obstinate front locks and just enter via the sliding door. When the sliding door finally unexpectedly fell off its track one day (I was also procrastinating replacement of a damaged sliding door lower roller) I was strongly encouraged to make the bus doors user friendly lest I suffer irreparable damage. What follows is the procedure for this surprisingly simple though long avoided repair: replacing the puny, pesky, marriage threatening door lock spring.
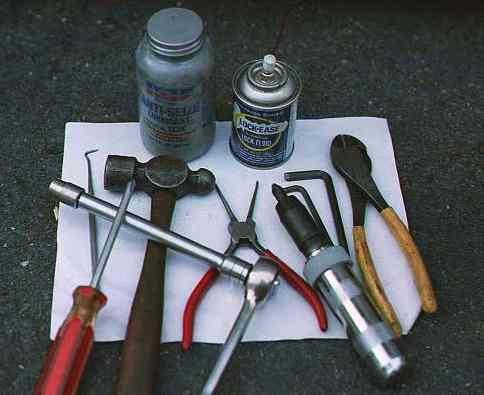
Tools:
- phillips screwdriver
- hammer
- impact screwdriver
- allen wrenches
- 10mm socket and ratchet wrench
- long, thin nosed pliers
- dentist's pick
- grease
- liquid graphite
- Anti-Seize
- wire snips
Part:
Procedure:
- a spring (one per door)
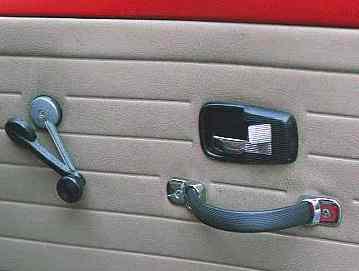
With the window raised completely, remove the window winder handle by prying off its plastic cover and unscrewing the phillips head screw. Remove the one screw holding on the plastic finger plate behind the door release lever, and remove the two screws holding the pull strap. If you're not a Westfalia owner, you might also need to remove the screws retaining the air duct.
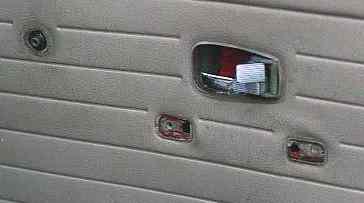
Now you're down to the inner door panel, which is held by twenty-five metal clips that grip to rubber grommeted holes in the door. The clips pop out of the holes as you finger pry your way around the panel. Some of the rubber grommets/seals might be missing or damaged. West Coast Metric sells a set of twenty-five (WCM part # 211 219A) for about $20 which work with the original clips. If you have aftermarket panels and clips on your door, you'll need different seals which are also available from WCM, though considerably cheaper. With the panel removed, you'll see the plastic sheet that protects the back of the panel from moisture. Peel it back to expose the top 2/3 of the door. If it's in poor condition, glue a fresh sheet in place to seal the door after your repair. If it's in good condition and friendly, it might allow you to carefully peel it off and stick it back on its old, tacky glue afterwards.
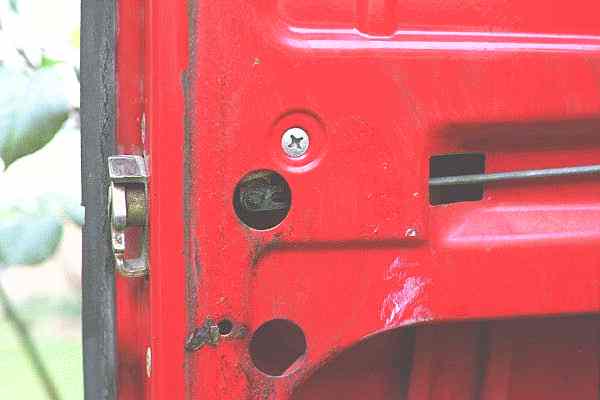
Remove the two 10mm head bolts retaining the door release lever. They might by obscured by some old foam, which will crumble away easily as you search through it. Unhook the lever mechanism from its rod.
On the other end of the rod, near the lock side edge of the door's inner panel, a circular opening reveals a spring steel keeper that secures the rod to the door lock. Pull off the keeper, slide it forward and remove the rod hook from the lock arm and then slide the rod forward.
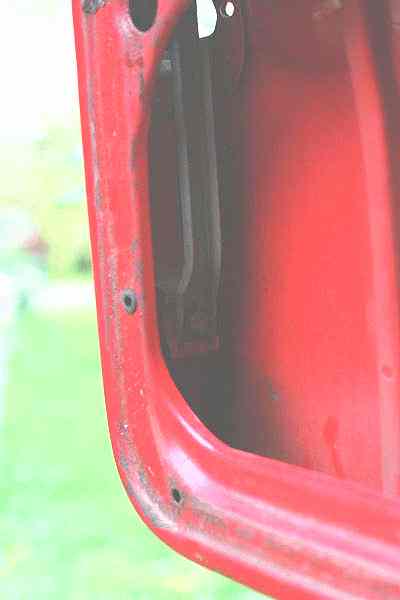
You'll also need to remove the rear window guide channel, which you'll find at the rear of the door, secured by a 10mm head bolt at its bottom and a spring clip (the push on/pull off variety) at its top. With the bolt removed, grip the channel firmly and pull straight down sharply. The spring clip holding the top is probably rusted in place. On both my front doors, the channel was removed easily after one or two sharp pulls, but some people encounter problems with a rusted clip. If it doesn't break free on the first try, be assured that a good yank downward will free the guide channel and there is no need to bend or hack at it. If your clip breaks you'll just need to study the rusty clip remains and make a replacement clip with minor ingenuity, and repair the top of the guide if necessary.
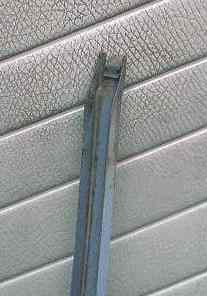
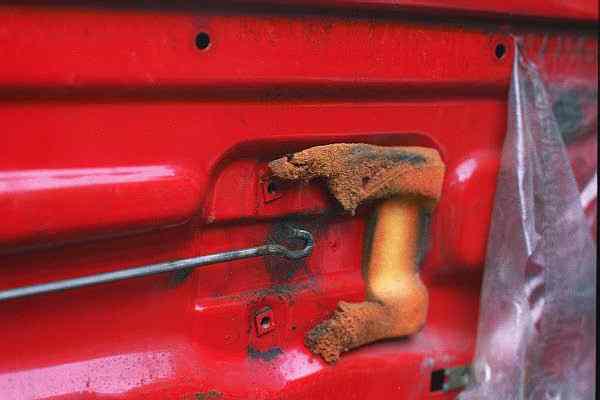
Next, remove the two allen bolts (also accessible from the inner panel side) that hold the door handle against the door skin. It's a good time to clean your lock cylinder, lube with liquid graphite, and verify the phillips head screw that holds the lever on its end is secure. Now all that's left between you and that cursed spring is the removal of the door lock itself. Before you can remove the lock, move the U-shaped piece (that grabs the striker plate post mounted on the door pillar when the door is closed) so that the open end faces down instead of at an angle. This allows clearance for lock removal.
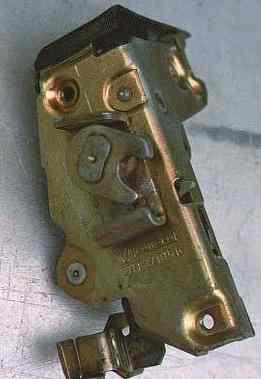
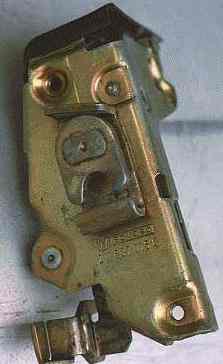
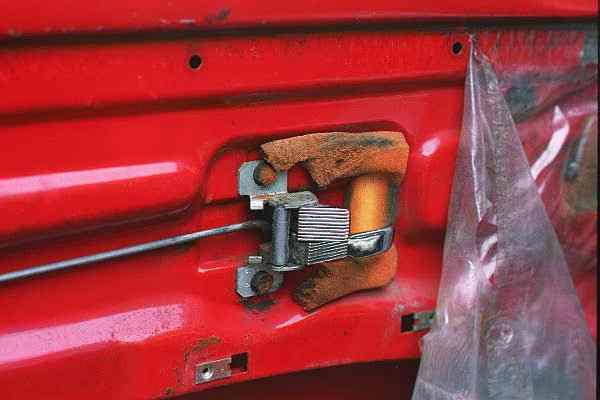
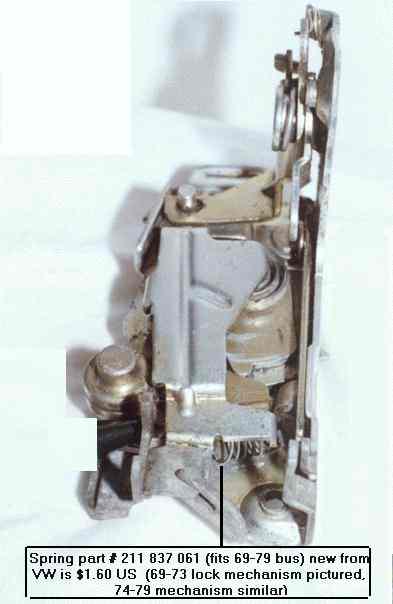
(Note: Left side door lock pictured. Right door lock is a mirror image of the left side. The two are not interchangeable.)
Removing two phillips head screws on the door's rear edge and a third one visible from the inner panel side will release the lock. You will likely need an impact screwdriver for this since those screws probably haven't moved since your bus left the factory. Don't bugger up the screw heads by forcing your impotent screwdriver blade against them, buy the cheap impact driver if you don't have one, you are guaranteed to find other satisfying uses for it later. If you're really cheap or desparate though, you might get away with hammering a phillips screwdriver against the head first before twisting (but if that fails, don't marr the screw heads, get the dang impact driver!).
Now that the lock is free, with your hand inside the inner door panel and fingers on the lock, work it down the door until you can pull it out the large opening on the bottom. Now is not the time for impatience (there will be plenty of time for that later when you confront the spring installation) so if the lock gets wedged inside the door before you can pull it out, gently work it up a bit and try again. A straight path down does the trick, that is, push the U-piece on the lock into the door until it just clears, and then try to work the lock straight down with the U still facing its usual direction. It will come out without force so don't attack your inner door panel with a pry bar in frustration. If it gives you trouble, take a breather and reapproach the problem with newfound faith. When you fail again, swallow your pride and ask your wife to remove it.
Once she's removed the lock, study how the plastic protector attaches to it and then carefully pop the protector off. Clean the lock and protector thoroughly. Study the photo of the lock to see where the spring attaches. If your old spring wasn't simply stretched, you might see the remnants of a broken spring still attached to one of the levers. Remove this bit and proceed to installing the replacement spring. You can still buy the OEM VW spring (part # 211 837 061 for '69-'79 buses) for about $1.60 US. Other springs might work, but the VW spring was made for the job. The upside: it's plated and stiff for its size and by using it you likely won't repeat your labor anytime soon; the down side: the cost is expensive relative to what you are receiving, so you might just buy one new VW spring to use as a base line for purchasing cheaper equivalents at your hardware store. Also, I did need to make slight modifications to the OEM spring (more on that below) to install on my '71 lock, so don't necessarily expect a perfect fit if you buy the "stock" part. Though you'll only need one spring per door, it's best to have a few on hand just in case you damage one attempting to hook it over the lever ends.
Installing the spring is another task requiring patience, so make sure your wife is still available for the inevitable. You'll need the thin nosed pliers and a dentist's pick or their equivalents. I found it easier to hook the spring on the more visible lever first (the other lever is obscured from view). Use your pliers to get the spring against the hook at the end of the lever, then work it onto the hook using the dentist's pick.
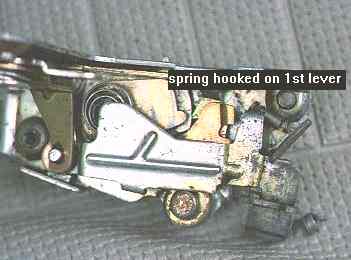
On the stock spring, three coils are bent away on either end to wrap around the lever ends. You might find it easier to snip off one coil on each end to make your task of slipping it over the hooks easier. This will not weaken the working part of the spring. You can easily damage the spring by bending or stretching its coils if force is directed inappropriately, removing that one coil might make your task easier and help avoid this. If you install a stretched/damaged spring it won't retract the lever completely and you'll have the same lock problems that brought you here, so don't be hasty. Once the spring end is hooked over the more visible lever, use the pliers to grab the other end and pull it over the hook on the second lever. You'll see there's only one good avenue to use your pliers, with the plier tip grabbing down into the opposite side open end of the coil.
When you're finished, move the lever and check that the spring pulls it all the way back (i.e. pull the lever, release it, then push it further in the direction it retracted to see if its travel continues). If it does, you must unhook the spring and start again. Either you stretched some coils when you installed the it (you'll see they're bent too much at the ends) or the spring is too long for some reason. Although the same spring should work for either door, I found that my passenger side door lock required a bit shorter spring for some reason. I cut off a few coils with a wire cutter, bent back two on that end to grab the hook and then reinstalled. Don't cut more than you need to or the spring will be stressed in use and break prematurely. Just take off enough coils as necessary for the lever to retract fully. Once the spring is correctly installed, give the lock back to your husband so he can make himself feel useful and direct him to the next paragraph.
It's time now to lubricate the lock. I used aerosolized liquid graphite on the relatively inaccessible joints and molybdenum grease with the dentist's pick on the more accessible joints. Work the moving parts of the lock so the lubricants will penetrate and then wipe off the excess. Pop the plastic protector back in place and then work the lock back up the door panel to where it attaches. Remember to first move the U-shaped piece so that its open end faces downward for clearance. Once it is screwed in place, put a finger in the hole where the door handle would be on the outer door skin and push the lever on the lock. The U-shaped piece will click into place at the proper angle to catch the striker plate. If you forget to do this, when you first close your door the striker will be stricken abusively.
Before you reattach the release lever rod to the lock with the spring steel keeper, clean and grease the rod's ends and also its center where it passes through the nylon block. Attach the door handle and the release lever. Now you're left with the rear guide channel. Dab some grease on its rusty clip so that it will slide easily in place. You'll suddenly realize it would've been a good idea (before you installed the lock) to look up into the door with a flashlight and memorize the location where the guide channel clips. But it isn't so bad, you know where the channel must bolt at its bottom, so look up inside the door to determine where the top needs to pass to keep the guide vertical when installed. If you have it placed correctly, the hole in the lower part of guide plate will be about an inch below the hole into which the bolt threads. At this point, give the channel a quick push upward and it will snap easily in place with the help of the grease. Install the bolt.
Now you can check your handiwork by closing the door and noticing that your lock problems have been eliminated. Breath a sigh of relief and install the plastic sheeting, inner panel and the remaining pieces you removed. To install the door panel, you might need to guide the clips into their holes with one finger while you press the panel's face with your other hand.
If you're one of those over-achiever types who swapped in a spare lock that you had cleaned and waiting in advance with a shiny, new spring that you installed on a rainy day while all the other bus folk were out frolicking (my, aren't you special?!!), now is when your preparedness might be penalized. The latch on your replacement lock might not meet the striker plate on the door pillar as your original did. To adjust the striker plate, loosen the two allen bolts holding it and adjust its position up, down, in, or out as needed to get your door to close smoothly. You can still feel cocky and superior though, this doesn't take long.
Congratulations, you've just repaired one of those depressing annoyances that accumulate, gnawing at your conscience, ever persuading you to sell your bus for something less worn. You've made your wife happy (or your husband happy if you've reached this point without him), now everyone can open the locked door with just a key. Now that you're motivated for more repairs, let's rebuild your engine!
Back to Main