Seat padding replacement (driver’s seat 68-74)
How to improve your own "roadholding"
A first timer’s installation report from The Netherlands..
by Caspar de Lint
Ever noticed some tobacco-like stuff under your front seats? Ever had a backache after you did a long haul in your loved loaf?? Are seat springs visible through your seat trim??? Well these are the signs that you are in for some serious seat padding replacement! Strange enough, I hesitated a long time before I decided to tackle this job. I even fitted the original headrests in my seats and still thought this job was beyond my skills. The thing is, the original paddings are NLA and used ones are as worse as yours (at best). TMI (http://www.tmiproducts.com/) supplies foam reproductions and very recently Wolfsburg West (http://www.wolfsburgwest.com/) announced their horsehair repros. When I started, those where not yet available. So do not ask me if they are a genuine fit or not, judging from their site they looked the real thing. Ron van Ness asked me to do some serious reporting on this subject because currently (12/99) there was none available in the Type 2 Library. If this article leaves any questions open, please e-mail me.
The major part of the budget is taken up by the new paddings, provided your seat covers are in decent shape (as mine where). I paid for my TMI repros $100/including shipping. Nice thing is, you don’t need any special tools for this job. What is imperative though, is an unburstable good mood!! You are gonna need it. Also a reminder: it is better to leave the seat alone for the moment if things do not work out. Take your time, nobody is saying this is a rush job! Best results are obtained with patience. Do not imagine you need any secret experience for this; I have a nine to five desk job and learned my tricks by lots of reading and trying (okee, I am in my 12th year now..). This piece of info is meant to clarify how I tackled the job and help likeminded Loaf-lovers ("pano-liefhebbers" in Dutch) around the world. Oh, and don’t mind the mess in the back of the pictures. I need to organize my garage.. I know.
seat ready to take apart
Disassembling
Take the seat out of your car. Lift up the lever for seat adjustment and slide it as far forward as it goes. For certain models you need to lift up a little retainer spring (at the back) near the seat rails to fully slide the seat out. Now put it on your workbench and be sure to wipe off any seatrail grease first. If present take the headrest off and pry out the plastic bushings where the headrest enters the backrest. Turn the backside towards you and look closely to the bottom of the backrest. Here you see four little triangular tabs.
triangular tabs one of four
Bend these backwards so you can undo the backlayer of the trim. Be careful, otherwise you may break them right off the frame. These tabs fold over two horizontal rods which are sewn in the trim. Once you have pried off the first rod, you will see that the bottom of the front section is also attached there in the same way. Slid this rod off the tabs as well. They are very sharp so be careful not to cut up yourself!! Now the cover of the backrest is no longer attached to the seatframe. Fold the flap of the frontside carefully forward.(To the front of the seat, where the adjustment knob and levers are..) Now you can grab the cover and gently slide it up the backrest. I may sound like a teacher here but if you are to reuse the covers, be patient!
backrest cover coming off
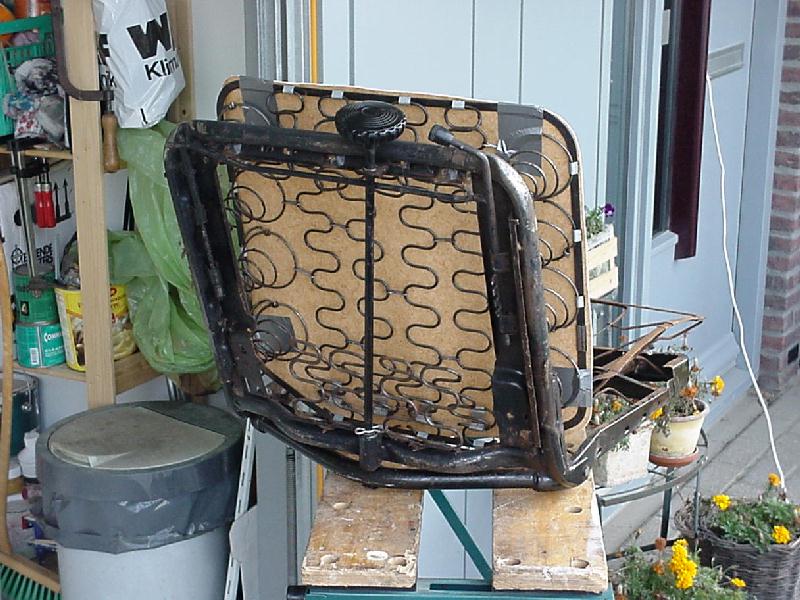
Now you have taken off the cover, you can pry off the padding (if it has not already fallen off by itself..) Now turn the seat upside down and determine where the bottom seat cover is attached to the frame.
seat base; seen upside down
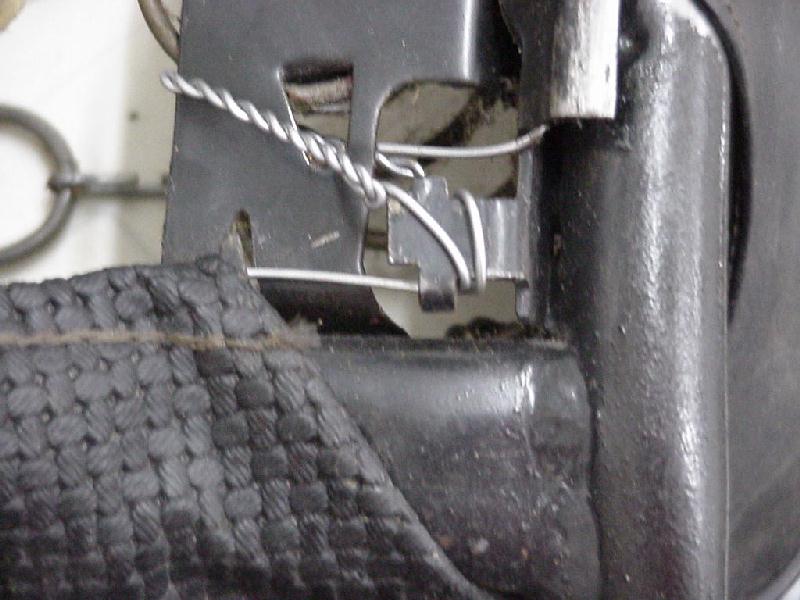
The base seat cover is held to the frame by means of a metal wire, which is joined together at the left bottom (see picture above & below). Again, those triangular tabs mentioned before are also present here; two on the rear (near the middle) and three in front of the seat. Carefully pry these up. In my experience this works best with a little flathead screwdriver and patience of course!
metal wire joint; detail shot
Tab seen here has NOT to be pried up, those are nearer the centre of the seat.
triangular tab on the front, one of three; detail shot
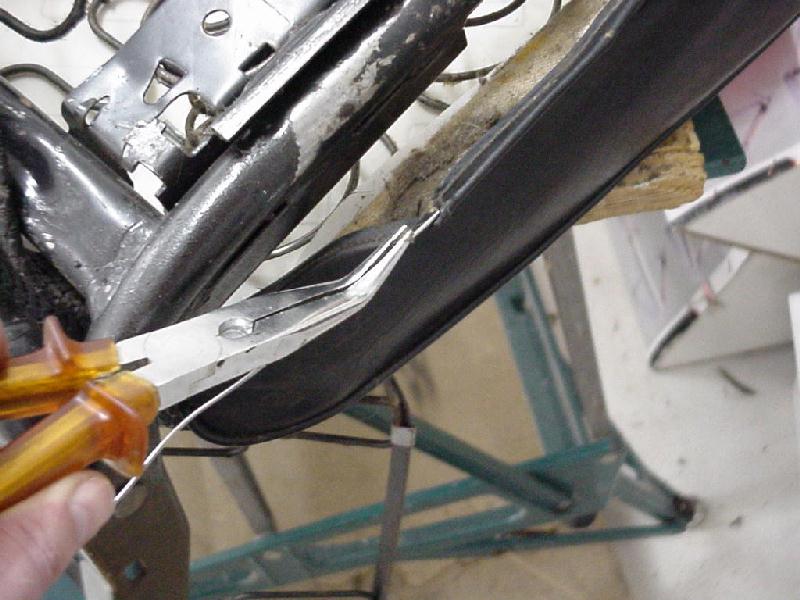
Now you inspect the sides of the base. Here you see two pieces of wire coming through the seat frame. Either you cut them off or unwind them, but be sure to dispose of the remains of these wires. Otherwise they may cut your covers later!
the seatmaster at work
Above you see where I just have cut one of those wires. In total there are four of them. Now you have undone all the attachments from the "main" wire to the frame. Next cut the wire at the joint (as seen before in detail). I prefer to cut it on both sides of the backrest. This way you can pull this section out more easily. Make sure you leave enough "flesh" to pull the rest of the wire out which goes along the frontside. At first it might seem that the wire will not give in, sure it won’t!! It has been there for about of a quarter of a century… Once the wire is out you can pull off the seat cover. Chances are you will again face a partly disintegrated horsehair padding. Clean up your working space and check whether the seat frame has survived in one piece. Check the backrest bottom crossmember; is it cracked? Mine was, it can be fixed with some welding. On the 76-79 versions I frequently spotted broken main (upright) sections of the backrest frame (these seat types are also used in early vanagons). Again the welder has to come into action. Check the springs; are they broken? Before reassembling make sure your frame & springs are in tip-top condition. It might be nice to impress your friends with your expert retrim once your finished?! Imagine the comfort once you are done, not to mention the satisfaction of the job done properly….
Assembling with new pads
But first you are in for some hours of major hobby fun!! Now comes the parts where you will curse yourself for starting on this job, or grind your teeth when it all does not seem to fit. Relax, I got round completing this job. So why can’t you?? Does my workshop look high-tech to you or do I use any mistery equipment?… Believe me; it can be done. Take your time. Biggest hazard is when you loose your patience; you will not achieve the best results possible.
Below you see the paddings as I got them from TMI. They arrived flatpacked; I ordered two sets for both front seats. I installed a "real" passenger seat (which adjusts and everything) by welding "driver" seatrails on the other side. Because my bus was original an army vehicle there where no mounting points for a passenger seat whatsoever. So after careful measurements I welded those rails into place. Although my bus is a ’76 allright, it has ‘68-’74 rails installed as original equipment, maybe this was to upset any Russians?! That’s how come I had to do two earlier driver seats. I do not know for sure if these paddings also fit an original passenger seat for a type 23 (with walk thru).
fresh paddings out of the box...
I feared that foam paddings might allow the springs to push through the padding more easily than original (and subsequently be visible trough the cover). To prevent this I used some thin vinyl carpet underneath the padding for extra support. For the best fit I choose to cut this to exact size of the seat frame. First I used the seat cover as a rough template to get a decent shape. Next I held it to the frame and trimmed any surplus material off, so that the piece lined up nicely with the frame. I fixated the material to the frame with some heavy duty hobby tape so that it would not slide around once you are busy installing and jerking on the cover installing it.

using the cover as template
supportive layer cut to size and fixated
Now it is time to put on the padding and slide the cover over it. Now you will notice that everything is a bit difficult to put it back into form. Imagine that the cover now, since a long time, is properly stuffed. Look for any wrinkles and try to ease them out. Pull on different sides and see the result. (above is a shot from the first seat, hence the different colour of the carpet support layer..)
foam pad & supportive layer in place
Now, when you have achieved a decent fit, work those edges around the frame at the front and insert the new steel wire which will secure the cover. I used medium "off the shelf" wire, nothing fancy. The hard part is inserting it again in the pouch where I pulled the old wire from. I installed the wire once the cover was back on, it might also work when you have slid the wire back in before putting it back on. I used a short piece of wire first to clear the way a bit and some WD 40 to help move things a little easier. It is wise not to wrinkle the wire excessively, this might weaken it. Later on you have to use medium force to pull it together, so you really need the strength of the material. This is patience test #1. Sometimes it will go at little pieces a time, make sure the wire does not pierce through the cover. Guide it throughout the process. I achieved good results using small pliers (see below).
inserting the wire with pliers
Once the wire is in, hook the metal tabs at the front of the seat back into place. Slide the wire trought the back section of the cover as well. Make sure it is routed correct over the adjustment rod in the middle (the shortest way is best) engage these lips here also. Now insert the small pieces of wire near the seat rails. Pull them tight while holding the seat frame down (seat in the upside down position) and twist them and the same time (patience test #2). Cut any excess wire off and fold it out of the way so you will not cut yourself later. Now it is time to pull the "cover" wire tight. If you have a helper handy let him/her press down the seatframe a little so you have the opportunity to secure the wire end to the frame (patience test #3).
tensioned & twisted seat cover wire
Once finished it should look something like this (see above). I know it is not completely original but the cross-like piece near the corner is excellent for securing the wire (twist it round it once, just like when you are sailing..) But if you wind the wire more than once around this element than the seat might not slide freely in its rails once you are done.. (this can be encountered by bending it a little inwards.) This segment is intended for mounting the retaining spring I mentioned at the start. I did the job on my own and only had two hands, if you have a helper ready here you can duplicate the stock "stitch".
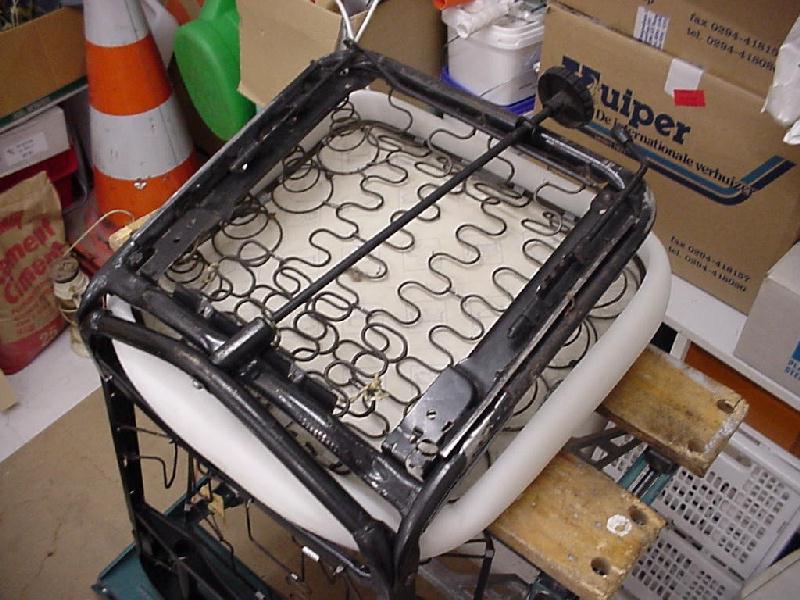
So the base is ready now. The backrest is simply a matter of performing the same trick cutting the protective layer. The catch is that the new padding here really makes its presence known. At first it will look as if the padding will not fit, or that you ordered the wrong item (double checking before ordering is a good idea anyway!!). In my opinion this is the ultimate patience/caracter test. I suggest a little break before putting this cover back. It might also help if you made sure that the backrest cover is at room temperature. I did the first seat during the early fall and finished the other seat in the last week of 1999. I noticed the difference while handling the cover during installation. Best is to work at the left and right side of the backrest; pulling it down each at a time. Take time & make sure not to rip the cover, while assuring that the seams align with the frame just as they did before. As you might notice from the picture below I tampered a little with the backrest bottom springs. This allows you to sit further back on the seat a bit while your spine halfway up gets more support from the springs.
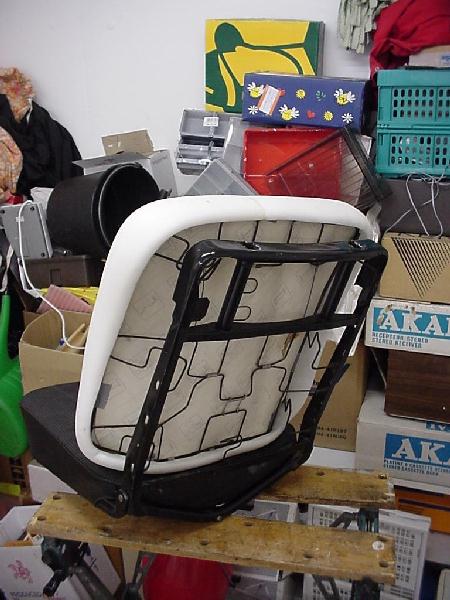
backrest ready for cover
The cross brace you see in the backrest is the frame for the headrests, they can be transplanted from a donor chair. But that’s another story and concerns mostly us Europeans, so if you got questions about this email me. For long time readers; note the green crate on the right top, this is my fuel heater parts bin…(see "heating" in the Type 2 library)
After a while you will have pulled that cover all over the backrest. Now put your knees on the bottom cushion in order to slide the front flap through to the backside with the wire in it. This has to be engaged to the metal tabs at the back. Do the same with the backside flap. Now gently taper these tabs flat so they do not stick out anymore, making sure they will not break in the process. If you do so; it is welder time again!! Finally, insert the headrest with its bushes.
Now your seat(s) are ready for a show off and you are ready for a cold celebration beer!! At least I was.. Now grease the seat rails a little before you install the seats back, makes adjustments so much easier. And enjoy your work and marvel at the increase in comfort.
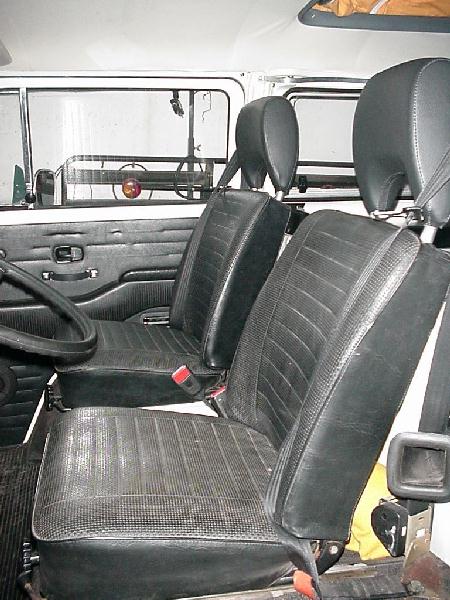
your cabin should look a bit like this, once you are done
Problem is; I got two very comfortable seats now, but our Dutch winter (with lots of road salt, sleet and everything) will delay any driving until march 2000!!! It is a luxury problem I know..
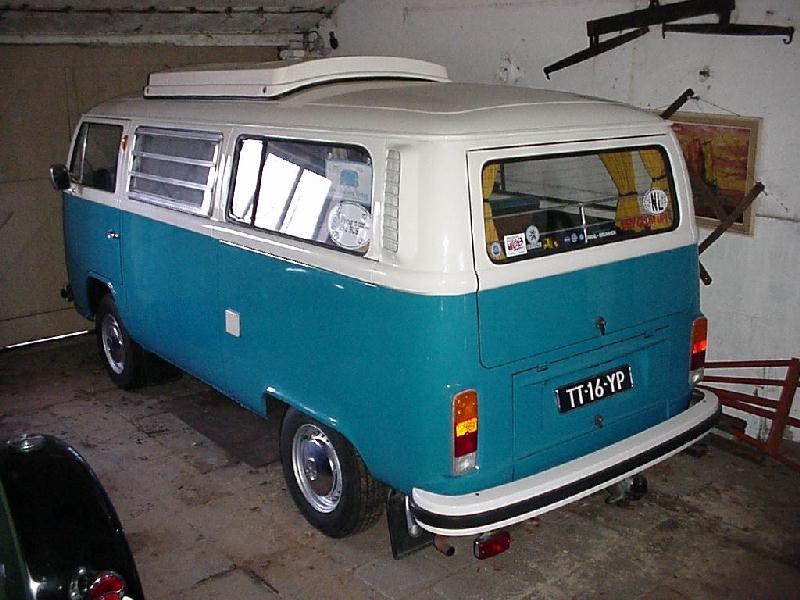
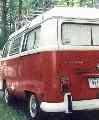
This real wild Pano is ready for rock & roll..
Good luck with your seat(s) and feel free to comment or send me your questions about this article. Your bus deserves a decent seat, it is worth it! Don’t you think so??
Caspar de Lint
Back to Main