'74-'79 Pop Top Retrofit on '67-earlier Type 2
by Richard Palmer (a.k.a. Poor Richard)
Author's note: I originally wrote this article in the spring of 1997. Since then, I've used the top with no problems for the last 2 years, and am still quite thrilled to have it. The only downside to it is that it adds a little extra weight to the top of the bus, which will make it handle more like a late model than a splitty. Other than that, it's great for road trips, camping, and just sleeping out in the bus! :)
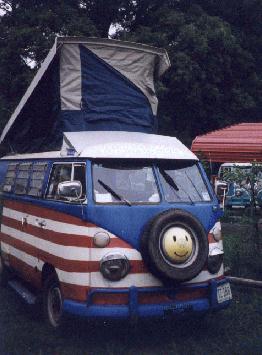
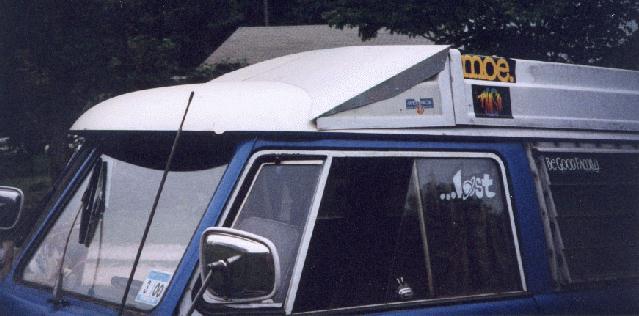
Pictured above: Notice the custom canvas, which I made by cutting out an old camping tent and sewing it up according to the pattern of the old canvas, which was too rotten to use.
Howdy all. This is for everyone who owns a bus, and has at some time wished for the extra sleeping space of the luxurious double bed pop-top, available on Westfalias starting in 1974. I myself have long craved such a top, but never desired the mechanical complexities of those later campers. So, the only course for me, and everyone else out there with no pop-top, is surgery. Having done the operation last weekend, I am pleased to announce that the necessary transplant is not painful, and the results are definately worth it.
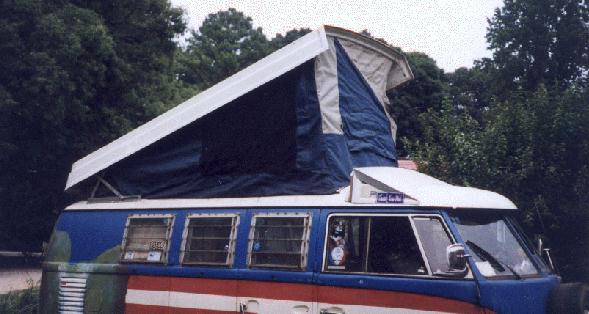
Pictured above: Side view of canvas, with larger than normal windows for better air circulation, and fabricated front air dam
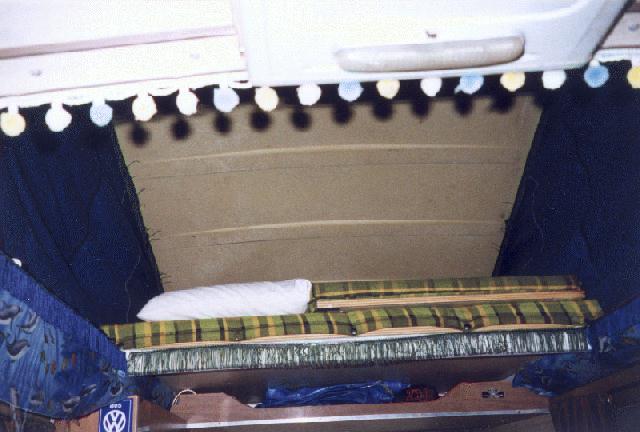
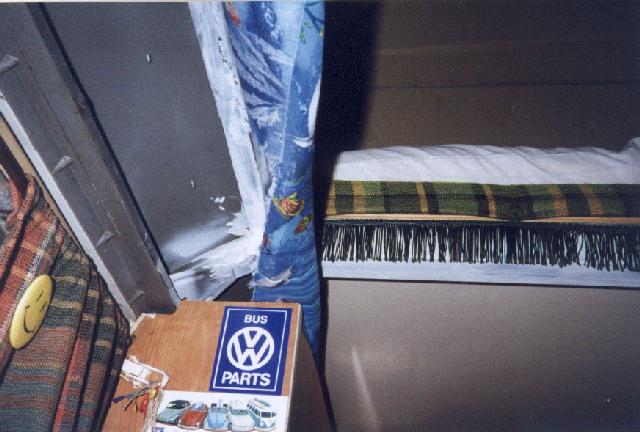
Pictured above: Interior view, looking backwards from front seats, showing front of bed in driving position.
Now this is not to take the process lightly, as it is a VERY involved task. You'll need to chop the rear 2/3 of your roof off (although I hear Vanagons may not need this, due to their flat roofs), and then do some serious welding. But, given a weekend, and the necessary equipment, you'll find it definately will not be a super-difficult task, and certainly rewarding.
As background, I have a '67 camper, which I feel is almost the perfect camper arrangement. The only thing it was lacking was the upstairs bed. So, after much ponderance, I decided that the transplant was in order. When a fellow listee mentioned a willing donor for the top, a '75 Westy, I knew that the time was right. I cut off the entire roof of the donor bus just to have everything as a pattern, and brought it home, which was an adventure in itself. I then took the entire assembly apart, just to see how it fit together, and to measure and inspect the metal framework that the factory fabricated for the top. The next step was to take EVERYTHING out of the rear of my bus. I do mean everything, because it's going to get really messy back there, and any seats or carpets will be ruined by sparks and welding scraps and such.
After a careful comparison of the two roofs, we confirmed that the split-window roof definately has a higher degree of curvature than the late model, but it doesn't make the project un-doable. Of course, as with any modification, measure twice, cut once. Actually, measure about 5 or six times. Once that roof is cut, it's gone. We used the sides of the bus frame as reference marks, and measured in towards the center of the roof. We cut from the front roof brace, behind the front doors, to the rear brace, just inside the rear hatch, and cut at a horizontal distance of 5 inches in from the sides of the bus. Now, this removed one of the major frame members, so that has to be replaced. You'll also need to run two rails the length of the bus inside the hole to firm up the edges, and rest the bed on.
Having seen fellow listee Stefan's just completed transplant, I had a good idea of how to do this, although his is a late model so dimensions are different. We ran a piece of 1" square 14g steel tubing between the front and rear roof braces on each side of the bus. We then welded a piece of 2" square 14g steel tubing across these, in place of the cross brace we had to remove. We also welded an additional 1" brace across the rear to support the rear of the bed. Once the frame was in, we bent/beat the roof sheet metal as flat as possible across the rails, and tack welded it down. At this point, paint is a good idea, to prevent nasty rust.
After that, it was time to mount the top. Now, before mounting the top, it's a good idea to fit the bed in, and drill all the holes necessary to mount it. Once it's all in, TAKE IT BACK OUT. Yep, that's right. It'll only be in the way now, but you want to get all the holes drilled before you put the top on, since it's a lot easier that way.
Pictured above: Rear hinge, passenger side
Now, set the top on the bus. Line it up all the way around, then carefully pop it up, and have someone mark the mounting holes for the hinges. Remove the top, and drill ONE hole for each hinge. Put the top back on, and bolt that one spot down. Now make sure the other holes line up, and everything is cool. If it doesn't line up, you've only made one hole, instead of 3.
After getting the hinges bolted down, it's time to mount the front brace. This one requires a lot of patience, as you have to make sure everything lines up with the top both up AND down. Check those holes very carefully, as it has to be perfect for the top to work right.
Next, mount the hold-down latch bracket for the front. Just make sure it lines up well, and mount it- that's pretty straight forward. After that, you're home free if you have a late model. Just fasten the canvas down, and attach the fiberglass luggage rack to the roof, and away you go.
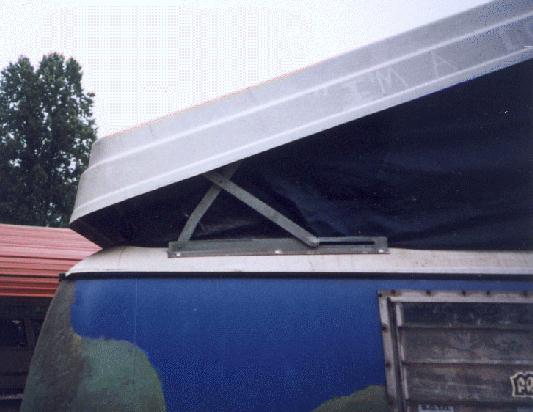
Pictured above: Front air dam, viewed with top down.
If you have a split, you still have a bit more to go. The front of the roof of a late model is VERY different from the front of a split, so you can't use the fiberglass luggage rack, or at least all of it. So, you have to get creative in finding a way to stop water from blowing up under the top. I cut the rear part off the luggage rack and used it as a base. I'm getting some aluminum flashing to round out the air dam to smooth it out a bit. Basically you want to keep things dry, and smooth out the lines for airflow as much as possible.
Another important note for splitties is that the hinges for the bed might not fit. Mine didn't, so we welded corner brackets to keep the front bed section from sliding off.
Pictured above: Interior view of welded-in frame, showing cut cross member where it re-attaches.
Anyway, all told, this makes for a good weekend project for 2 or 3 people, assuming you can weld, and aren't afraid to cut a hole in your roof.
You need:
- donor roof section with ALL the hardware
- reciprocating saw
- welder (we used a MIG set-up)
- grinder
- various screwdrivers and ratchets
- patience
Preparing the fiberglass top:
After 20+ years of rain and sun exposure, the fiberglass top may be in rough shape. It's definitely worth your time to go ahead and recondition it now, while it's easy to access. First, wash all the dirt, moss, and grime that cover it. Then, wearing breathing protection, lightly sand the top. Finally, go to a marine supply company, and get special fiberglass paint. Go ahead and spend a few more dollars to get GOOD high-grade specialty paint, as most other paints will just peel off. I found a quart will do two coats, which will make your top very happy for years to come.
Making new canvas:
The canvas tent material of the top may often also be in bad shape. While you can purchase ready-made replacements, if you wish to save money or create your own for aesthetic reasons, it's easy. I had an old, large, camping tent, which I used to make a new top out of. I took the old canvas out of the top, and carefully cut it apart at the seams. I then traced each piece on the tent, cut the new pieces, and sewed them together. Voila! A new tent, with bigger windows, and a smaller pricetag!
It can make all the difference between sleeping 3 people uncomfortably, and 4 people in the lap of luxury. Go for it! Happy camping!


